Although the DTF transfers appear simple with a three-step application of placement, pressing, and peeling, the method needs exact execution and heat press time for DTF transfers to create premium results. The difference between a professional, retail-quality print and a peeling, stiff print is usually the heat-press settings.
Many apparel businesses lose profits because customers return products that result from improper pressing. The good news: once you understand the correct process, you’ll achieve consistent, long-lasting prints every time.
This guide provides detailed information on the required steps and settings for successful transfer printing and the best heat press settings for DTF transfers. So, read on to learn the proper steps before you start printing.
Understanding Heat Press Pressure DTF Transfers
The DTF transfer process uses hot-melt adhesive powder as its primary adhesive material. The adhesive transforms into a liquid when exposed to heat and pressure, enabling it to permeate the fabric fibers and permanently secure the design.
-
The adhesive remains inactive when the temperature drops below its activation threshold.
-
The bonding strength decreases when pressure remains below the minimum required level.
-
The printed material becomes brittle when exposed to excessive temperature.
Step-by-Step Guide to Heat Press Settings for DTF
1. Pre-Press Garments
The first step of garment preparation for pressing needs to be completed before any other work can start. The moisture in garments comes from both their packaging materials and the surrounding air. This moisture blocks adhesive bonding, leading to peeling after laundry washing.
How to pre-press:
-
Position the garment for pre-press.
-
Press for a duration of 5 to 7 seconds. This process removes three elements:
-
Eliminates all moisture
-
Eliminates all wrinkles
-
Eliminates all fabric shrink tension
2. Position the Transfer
Pressing requires careful transfer alignment according to its specified requirements.
Alignment tips:
-
Use alignment rulers and laser guides.
-
Ensure the surface is smooth with no seams under the platen.
-
Place the fabric without stretching during the process.
-
The adhesive will become permanent after it melts, requiring precise measurements.
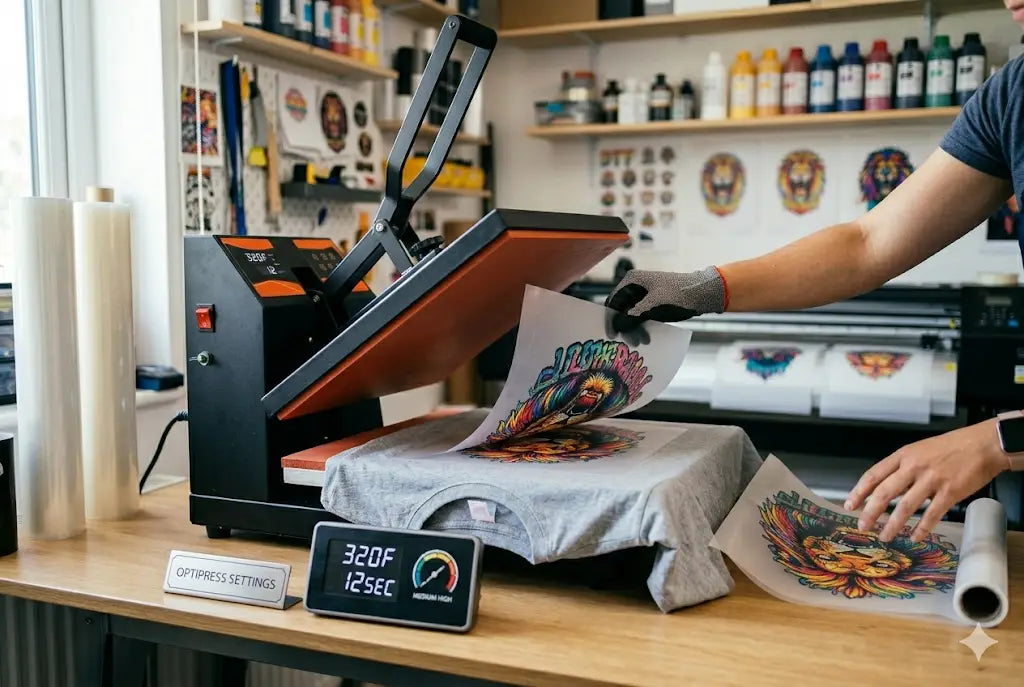
3. Apply the Main Press
Most errors occur at this stage. Use standard DTF press settings for most fabrics:
-
Temperature: 300°F–320°F (150°C–160°C)
-
Time: 10–15 seconds
-
Pressure: Medium-firm, applied uniformly over the design area
Uneven pressure results in incomplete adhesion.
4. Peel the Film Correctly
-
Cold peel: wait until cool
-
Warm peel: 5–10 seconds
-
Hot peel: immediately
Peel at a low angle slowly. If part lifts, stop, and repress with cover sheet.
5. Second Press (The Professional Secret)
Transforms a normal print into retail-quality using ideal heat press settings for DTF:
-
Place a parchment or Teflon sheet
-
Press: 5–10 seconds, same temperature, medium pressure
-
Benefits: softer feel, better wash durability, matte finish, embedded fibers
Recommended Settings by Fabric Type
-
Cotton: 310°F, 12–15 sec, medium-firm pressure.
-
Polyester: 285–300°F, 10–12 sec, medium pressure.
-
Blends (50/50, Tri-Blend): 300°F, 12–15 sec, medium pressure.
-
Heavy Hoodies: Increase pressure, extend second press.
How to Test Your DTF Transfer Heat Press Settings
Before bulk production:
-
Press one test shirt
-
Wait 24 hours
-
Stretch print firmly
-
Wash once
If edges lift, increase pressure, not temperature.
Conclusion
Press DTF transfers correctly using balanced temperature, firm pressure, and proper finishing techniques. Follow this sequence: pre-press, alignment, main press, correct peeling, and second press. Proper execution produces soft, durable, retail-ready prints, higher product quality, fewer returns, and increased customer satisfaction.
Start with our Gang Sheet Builder and DTF Sample Pack to create high-quality, ready-to-press designs!
FAQs
1. Why is my DTF transfer peeling after washing?
The peeling occurs because the adhesive fails to form a complete bond with the fabric. The process fails when you use insufficient pressure, unsafe temperature settings, or skip the second finishing press. Additionally, never wash the fabric within 24 hours of transfer installation to avoid peeling.
2. How to heat-press DTF transfers?
The DTF pressing process requires a temperature of 350°F, which exceeds safe operating limits. The high temperature damages the adhesive powder, resulting in hardened print materials that develop cracks after washing. The proper temperature range for the process should remain between 300 and 320 degrees Fahrenheit to achieve both flexibility and durability.
3. What pressure should be used for DTF transfers?
The DTF transfer process requires operators to apply medium-to-firm pressure, which allows the adhesive to penetrate the fabric fibers properly. The adhesive requires specific pressure levels: light pressure causes peeling, while heavy pressure results in fiber flattening, producing shine marks.
4. Should I always use cold peel for proper DTF heat press temperature time?
No. The type of film determines which method should be used for peeling. Some transfers require a cold peel, others a warm or hot peel. The supplier's instructions must be followed, as incorrect peeling temperature results in design distortion and edge lifting.
5. Why does my DTF print look shiny?
Excessive heat during the second press creates a shiny effect because the material was pressed without a protective cover sheet. The high temperature causes the adhesive to melt, forming a surface layer that produces a glossy appearance rather than a matte finish.
6. How do I fix a lifting transfer?
The design needs to be covered with either parchment or Teflon material before performing a second pressing operation that requires 8 to 10 seconds of steady pressure to avoid lifting issues.
7. How long should I wait before washing?
The garment needs to wait for 24 hours before washing begins. The process enables adhesive materials to complete their curing process while their molecular structure establishes permanent bonds with the fabric fibers. The premature washing of garments results in bonding disruption, which causes early material degradation and loss of strength.
8. Do I need a commercial heat press?
A commercial press isn’t mandatory, but a quality heat press with adjustable pressure and accurate temperature is strongly recommended. The process needs consistent pressure and uniform temperature distribution to achieve dependable adhesive results that produce professional-quality DTF prints.
9. Why do DTF transfers on polyester scorch and peel easily?
The material polyester needs protection against excessive heat because it becomes damaged when exposed to high temperature levels (which lead to DTF transfer peeling issues). Excessive heat creates two issues: it either results in color changes or enables dye materials to spread into the printed area.
10. What makes a premium DTF print?
A premium DTF print comes from proper preparation, proper DTF transfer pressure settings, correct temperature, firm pressure, accurate peel timing, and a finishing press. The design embedding process establishes permanent design patterns within fabric materials, resulting in a soft texture, long-lasting strength, and a retail-ready appearance.