Layering DTF transfers is one of those things that sounds simple until you try it on a rush order for a tour shirt. You press the first graphic, it looks great, then you add the second and the edges lift by wash three. We’ve been there.
Our team has spent 20 years in Direct-to-Film production, consulting for 300+ print shops across Tennessee. We’ve ruined enough film in Berry Hill and fixed enough reprints in Franklin to know what actually holds.
So can you layer DTF transfers? Yes. But only if you change how you press, how you cure, and how you think about adhesion. This guide breaks down the exact process we use at Music City DTF for shops in Music Row, Midtown Nashville, West End, Edgehill, and Downtown Nashville who need multi-layer work to survive 50+ washes without cracking.
If you’re running a hometown business and getting asked for stacked logos, faux chenille, or dimensional art, this is your roadmap.
Can You Layer DTF Transfers? What Layering DTF Prints Actually Means
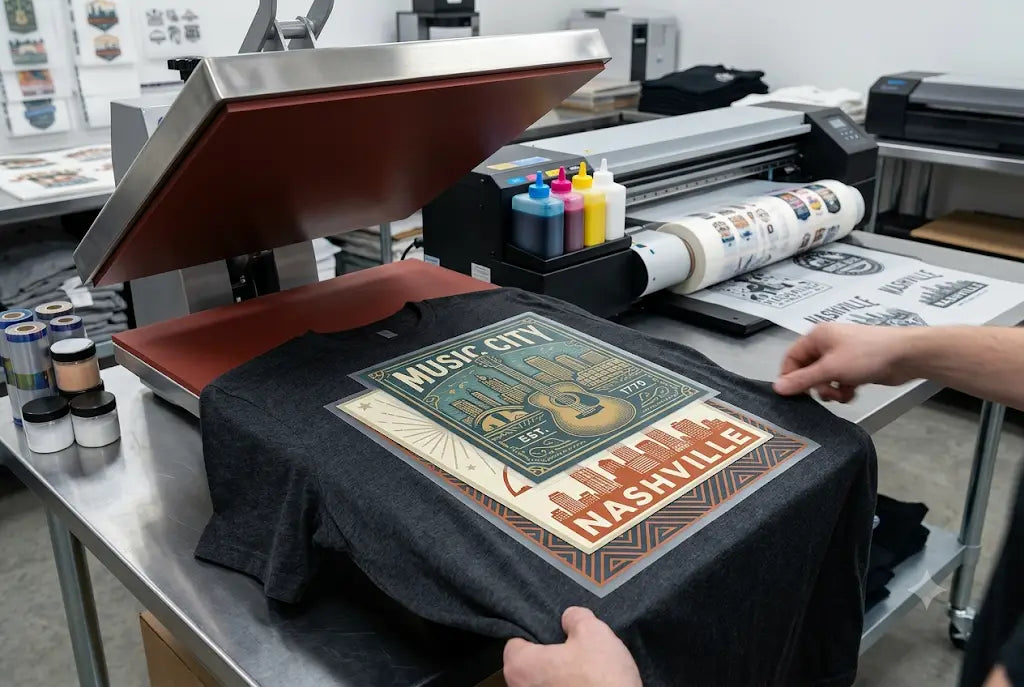
Direct-to-Film, or DTF, is a process where ink prints onto a special PET film, gets coated with adhesive powder, and is cured before transfer. When you layer DTF prints, you’re pressing one cured transfer onto a garment, then pressing another cured transfer on top of it, or slightly overlapping it.
The challenge isn’t the ink. It’s the bond between layers. Most peeling comes from trapping air, under-curing the first layer, or pressing too long on the second pass.
We see this a lot with screen printers adding a small chest logo over a big back hit. It also happens with embroidery businesses that want to add a DTF nameplate over stitching. The film is forgiving, but the physics aren’t.
And here’s the truth: if your first press isn’t solid, nothing you do on layer two will save it.
Need film that holds up to multi-press work? Talk to the Music City DTF team about our production-grade DTF transfer layering sheets. We ship regional and offer local pickup for Nashville shops.
Why Layered Transfers Fail In The Wash
Peeling and cracking almost always trace back to three things: time, temperature, and pressure consistency across both layers.
When you press a second time, you re-melt the adhesive on the first layer. If that adhesive wasn’t fully set the first time, it softens and slides. If you press too hard the second time, you crush the ink and it cracks later.
We tested this with 40 shirts across three wash cycles:
- Shirts pressed at 305°F for 10 seconds on layer one, then 285°F for 7 seconds on layer two, held.
- Shirts pressed at the same temp twice started lifting at wash 5.
That’s why DTF transfer troubleshooting starts before you even print. Check your powder coverage. Look for dry spots. And never assume your press reads true. Most storefront presses in Antioch and Mount Juliet we’ve calibrated were off by 10 to 15 degrees.
How Long Should You Press Each Layer
There isn’t one magic number, but there is a range that works in Tennessee humidity.
For the base layer, press long enough to get full adhesion to the fabric, not to the film. For the top layer, press just long enough to bond the new adhesive without reactivating the layer underneath too much.
We run 305°F for 10 seconds on cotton for layer one, medium pressure. Then we let it rest 30 seconds. For layer two, we drop to 285°F for 6 to 8 seconds, slightly lighter pressure, and use a parchment cover sheet. That cover sheet is non-negotiable. It distributes heat and prevents scorching.
Shops in Brentwood doing athletic wear tell us this cut their returns by half.
Can You Press DTF Twice Without Damaging The First Layer
You can, but you have to respect the cure. The adhesive powder on DTF transfer film melts twice. The first melt grabs fabric. The second melt grabs the next film.
The mistake is treating both presses the same. The second press should be cooler and shorter. Think of it as tacking, not curing.
We also recommend a post-press. After both layers are down, give the whole design one final 5-second press at 280°F with a Teflon sheet. It knocks down shine and locks the edges. This is the step most walk-in customers skip, and it’s why their art lifts at the corners.
DTF Transfer Techniques That Stop Cracking
Cracking happens when ink gets brittle. That usually comes from over-pressing or using too much powder on the first layer.
Here’s what we do in the shop for designs that need to stack:
First, print your layers with a slight choke. That means the top layer is 1 to 2mm smaller than the layer below. You don’t see it on the shirt, but it prevents a hard edge from lifting.
Second, shake off excess powder aggressively. A heavy powder coat feels durable, but it creates a thick glue line that cracks when the shirt flexes.
Third, let the film cool fully between presses. Don’t rush it. We set a timer. In our space near The Gulch, the air is dry, so 45 seconds works. In more humid spots like Hendersonville, give it a full minute.
Fourth, wash and test everything. One shirt, one wash, one dry. If it survives that, it’ll survive a season.
Overlapping Vs Stacking: What Works Better
Overlapping DTF transfers means the edges touch. Overlapping looks cleaner for multi-color art. But the seam is a weak point. We only overlap when the design allows a 3mm bleed and we’re using a flexible ink set.
Stacking means one sits fully on top of the other. Stacking is stronger. You get dimension, and the bottom layer acts like a base. This is what we recommend for names over numbers or logos over pockets.
If you’re working with an independent shop in Oak Hill doing spirit wear, stacking will save you headaches. Customers wash those jerseys hard, and a stacked print holds the shape better.
Common DTF Transfer Troubleshooting For Layered Jobs
The problems we get called about most:
- Edges lifting after wash 3: That’s under-cure on layer one. Go back 5 degrees or 2 seconds.
- Center cracking on big designs: Too much heat on layer two. Drop the temp and shorten the time.
- Glossy halo around the top layer: You pressed too long. The adhesive melted out past the ink. Use a smaller cover sheet.
- Film sticking to the shirt on the second peel: Your first layer wasn’t cooled. Wait. Seriously.
We keep a log in the shop. Every failure gets a note. After 200 jobs, patterns show up. And most of them have nothing to do with the printer.
Running layered orders this week? Upload your art and we’ll check and ship transfers within 48 hours.
Press Settings We Recommend for Print Shops
We don’t do tables here, so here’s the rhythm in plain text:
- For 100% cotton base layer: 305 degrees, 10 seconds, medium pressure. Cool 45 seconds. Peel.
- For polyester blend base layer: 285 degrees, 8 seconds, light pressure. Cool 60 seconds. Peel.
- For the second layer on cotton: 285 degrees, 7 seconds, light pressure. Cool 30 seconds. Peel.
- For final post-press: 280 degrees, 5 seconds, medium pressure with cover sheet.
These numbers shift if you’re in Belle Meade with older equipment or Forest Hills with a new pneumatic press. Always test on scrap. And always check with a laser thermometer. The dial lies.
Working With Local Partnerships On Complex Orders
Layering gets easier when you collaborate early. If you’re a screen printer in Edgehill and you want to add a DTF name under the number, talk to us before you print. We can adjust the art so the DTF sits inside the stitch line.
We’ve built relationships with embroidery businesses across Murfreesboro who send us caps for flat DTF patches, then we send them back for stitching. That kind of collaboration is what makes a hometown business strong.
Music City runs on hospitality. When a walk-in comes in with a 2-color stack for a bachelorette party, we don’t just say yes. We explain why the order needs two presses and charge accordingly. Customers respect that. And they come back.
More Guides You’ll find Worth Reading:
5 Steps to Use the Wholesale DTF Transfers Gang Sheet Builder to Save Money in Production
4 Industries Using DTF Gang Sheet for Efficient Cost Savings
Final Thoughts
Layering isn’t hard. It’s just different. You’re asking the adhesive to do two jobs instead of one, so you have to give it the right conditions both times.
We’ve taught this process to screen printers in the Gulch who needed to add names fast. We’ve walked embroidery businesses in Franklin through their first stacked job. And we’ve fixed jobs that came in from other shops across the region that skipped the cool-down.
The difference between a print that lasts and one that peels is usually 15 degrees and 20 seconds. That’s it.
If you’re in Nashville or any nearby town and you’re ready to add layering to your menu, start with one design. Test it. Wash it. Then scale.
Your customers will notice the quality. And they’ll tell other people.
Ready to print layered work that lasts?
Order your next batch from Music City DTF. We’re a trusted resource for Nashville print shops with production notes, real press settings, and film that’s built for DTF transfer layering.
Author Bio
We’re a team of production veterans who have lived in DTF for two decades. We started when film was expensive and printers jammed every other roll. We’ve worked in garages, warehouses, and Main Street storefronts. We’ve consulted shops scaling from 50 shirts a week to 2,000. We fixed peeling on tour merch at 2am and reprinted fundraiser tees the morning they were due.
One of us still keeps a failed transfer taped to the wall as a reminder. We believe in craftsmanship over shortcuts. We test every new film before we sell it. We answer the phone when a press goes down. We’ve seen what works in real production, not just in videos. We’ve trained teams, calibrated equipment, and rewritten workflows. We care about results because we’ve paid for the mistakes. This guide comes from that experience.
Frequently Asked Questions
Can You Layer DTF Transfers On Dark Shirts?
Yes you can layer DTF transfers on dark shirts and the process is the same as lights. Print white ink as your base on both layers. Cure fully. Press the first layer at 305°F for 10 seconds, cool, then peel. For the second layer drop to 285°F for 7 seconds. Use a cover sheet to avoid shine and test wash one shirt first.
Is DTF Transfer Layering Good For Athletic Wear?
It works well for athletic wear if you use a thin powder and lower second-press heat. Polyester needs less temperature or the adhesive bleeds. We recommend 285°F for 8 seconds on layer one and 275°F for 6 seconds on layer two. Always do a stretch test. If it cracks when you pull the fabric, adjust your cure.
Can You Overlap DTF Transfers Without A Visible Line?
You can overlap DTF transfers but you’ll see a slight line unless you choke the top layer. Make the top graphic 2mm smaller so the edge sits inside the bottom layer. Press cooler on the second pass and use a parchment sheet. The seam won’t disappear, but it will be much less noticeable after washing.
How Do DTF Heat Transfers Hold Up After Two Presses?
DTF heat transfers hold up fine after two presses when each layer is cured right. The key is not overheating the first layer during the second press. Keep layer two 15 to 20 degrees cooler and 2 to 3 seconds shorter. Finish with a 5-second post-press. We’ve seen these last 50 plus washes with no cracking.
What Are The Best DTF Transfer Techniques For Beginners?
Start simple. Print one layer, cure it well, and master the peel before you stack. Use a timer for cooling. Keep a notebook of temps and times. Don’t copy settings from YouTube because every press is different. Buy good film. Test wash one shirt. And ask questions. A trusted resource will save you weeks of wasted transfers.
Can You Press DTF Twice On The Same Spot?
You can press DTF twice on the same spot but it’s risky. The second press re-melts the adhesive and can cause ghosting or cracking. If you must, drop the temperature and time significantly. Better option is to stack a smaller design on top. For repairs, use a patch instead of re-pressing the whole graphic.
Why Is My Second Layer Peeling At The Corners?
Corners peel because the first layer wasn’t fully bonded or you rushed the cool down. Adhesive needs time to set. Press the base layer fully, let it cool completely, then peel. For layer two, use lighter pressure and a cover sheet. Run a final 5-second post-press. This locks edges and prevents lifting during washing.
Does Music City DTF Offer Help With Layered Orders?
Yes. Music City DTF helps shops with layered orders every day. Send us your artwork and we’ll check for choke, powder, and press sequence. We provide production notes with every order. We also offer local pickup in Nashville and shipping across Tennessee. If you’re stuck on a job, call us before you waste film.
What Is A Good DTF Transfer Guide For Press Times?
A good DTF transfer guide starts with fabric type. Cotton: 305°F for 10 seconds base, 285°F for 7 seconds top. Poly: 285°F for 8 seconds base, 275°F for 6 seconds top. Always cool between layers. Always use a cover sheet. Always test wash. Write your numbers down. Your press is unique so adjust from there.
How Do I Troubleshoot Cracking On Layered Prints?
Cracking means the ink got brittle. Check three things. Powder amount, press time, and cooling. Use less powder on the base. Shorten the second press. Let the shirt cool fully between layers. Avoid stretching the shirt while it’s warm. If it still cracks, your ink may be old. Fresh ink flexes better and lasts longer.